Jeff and Nick, two friends of mine, have started up a podcast called RPG Weekly and in the latest episode they invited me on to chat about games.
RPG Weekly Episode #1
Monday, October 25, 2010
Monday, October 11, 2010
Interrior Mess
Still lots of work to be done. The software side of things is barely configured. I need to finish configuring the OS to automatically launch Mala and then configure Mala to run things smoothly. I also haven't been able to get Daphne to recognize my joysticks, although it will "see" the buttons just fine.

And there is a lot of clean up inside once everything is working...
Then I need to finish the Marquee and design the CPO...

And there is a lot of clean up inside once everything is working...
Then I need to finish the Marquee and design the CPO...
More Mame Cabinet Progress
More work done on the cabinet this past weekend. The parts I ordered for the coin door showed up so I installed those
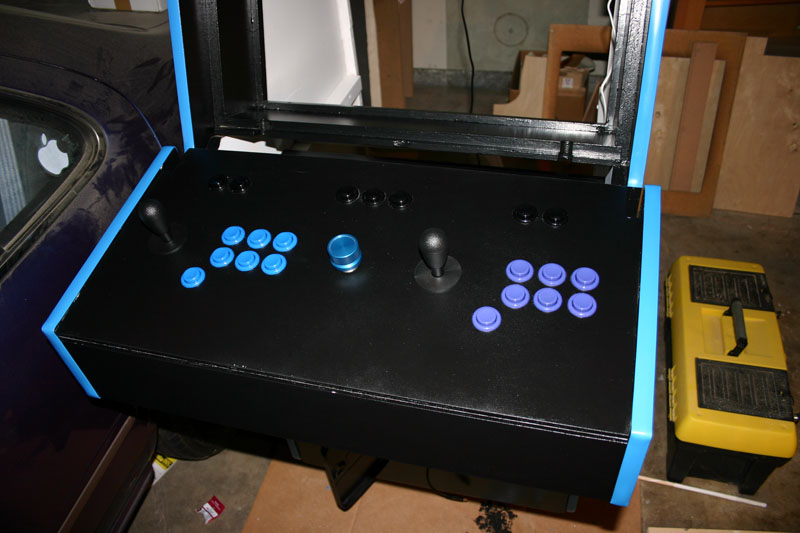
Mounting the control panel to the cabinet had a few rough spots. I ended up needing to sand the paint down so the bottom of the control panel would fit inside the cabinet properly.

In this pic you can see the control panel base, without the control panel itself. I still need to order some clamps to hold it in place. Inside you can see where the black control panel bottom meets the white cross piece I mounted inside. That is where the clamps will go.

The control panel slides out, once out far enough, I can reach inside and undo the two clamps holding the control panel to the base.

It is a little hard to see the details of the control panel in place because of the lack of contrast of all the semi-gloss black surfaces.

From this angle the way the control panel meets the cabinet is more visible.
Mounting the control panel to the cabinet had a few rough spots. I ended up needing to sand the paint down so the bottom of the control panel would fit inside the cabinet properly.

In this pic you can see the control panel base, without the control panel itself. I still need to order some clamps to hold it in place. Inside you can see where the black control panel bottom meets the white cross piece I mounted inside. That is where the clamps will go.

The control panel slides out, once out far enough, I can reach inside and undo the two clamps holding the control panel to the base.
It is a little hard to see the details of the control panel in place because of the lack of contrast of all the semi-gloss black surfaces.

From this angle the way the control panel meets the cabinet is more visible.
Saturday, October 9, 2010
Cabinet Update
I secured the speakers in place using small mounting squares and zip ties.

Next, I finished the coin door repaint and mounted that into the cabinet.

The plastic pieces from the coin door were in such rotten shape that I ordered new buttons, bezel and coin return flaps from Lizard Lick. It should look pretty good with those in place.
When I got the cabinet, it was missing two sets of bolts/brackets that help secure the coin door in place. One of the guys on the BYOAC forums pointed me to The Arcade Boneyard, where I ordered the replacement pieces.
Friday, October 8, 2010
Cabinet Updates
First I installed a new florescent fixture for the marquee light. The cabinet originally had a single incandescent bulb. Then I started on the T-Molding

I need to buy a new hot glue gun, the end of one piece of t-molding isn't staying in place on its own. I'm happy with how well the t-molding worked here, the original t-molding grove was offset and damaged in a lot of places.
The control panel wiring is nearly complete, I haven't figured out where to mount the spinner's little pcb board. Once I've figured that out, and tested all the buttons, then I'll tighten up the wiring, right now it is a bit of mess.

I'll put t-molding along the bottom edge of the top of the panel once the cpo is in place. Which reminds me I still need to design the cpo.
Subscribe to:
Posts (Atom)